
Brewing Equipment Upgrades and an attempt at my first Gose
Being President’s Day, in remembrance of our founding-fathers’ love of spirits, and my own interest in creating “adult” beverages, I ended up brewing a batch of Gose (pronounced “Go-zah”) using a kit I received from a family member. It’s the first time I’m attempting a Gose, so we’ll see how it turns out.
I took this opportunity to also take some new equipment for a test drive, including a new Fermentap weldless ball valve (w/ spigot) and an immersion cooler.
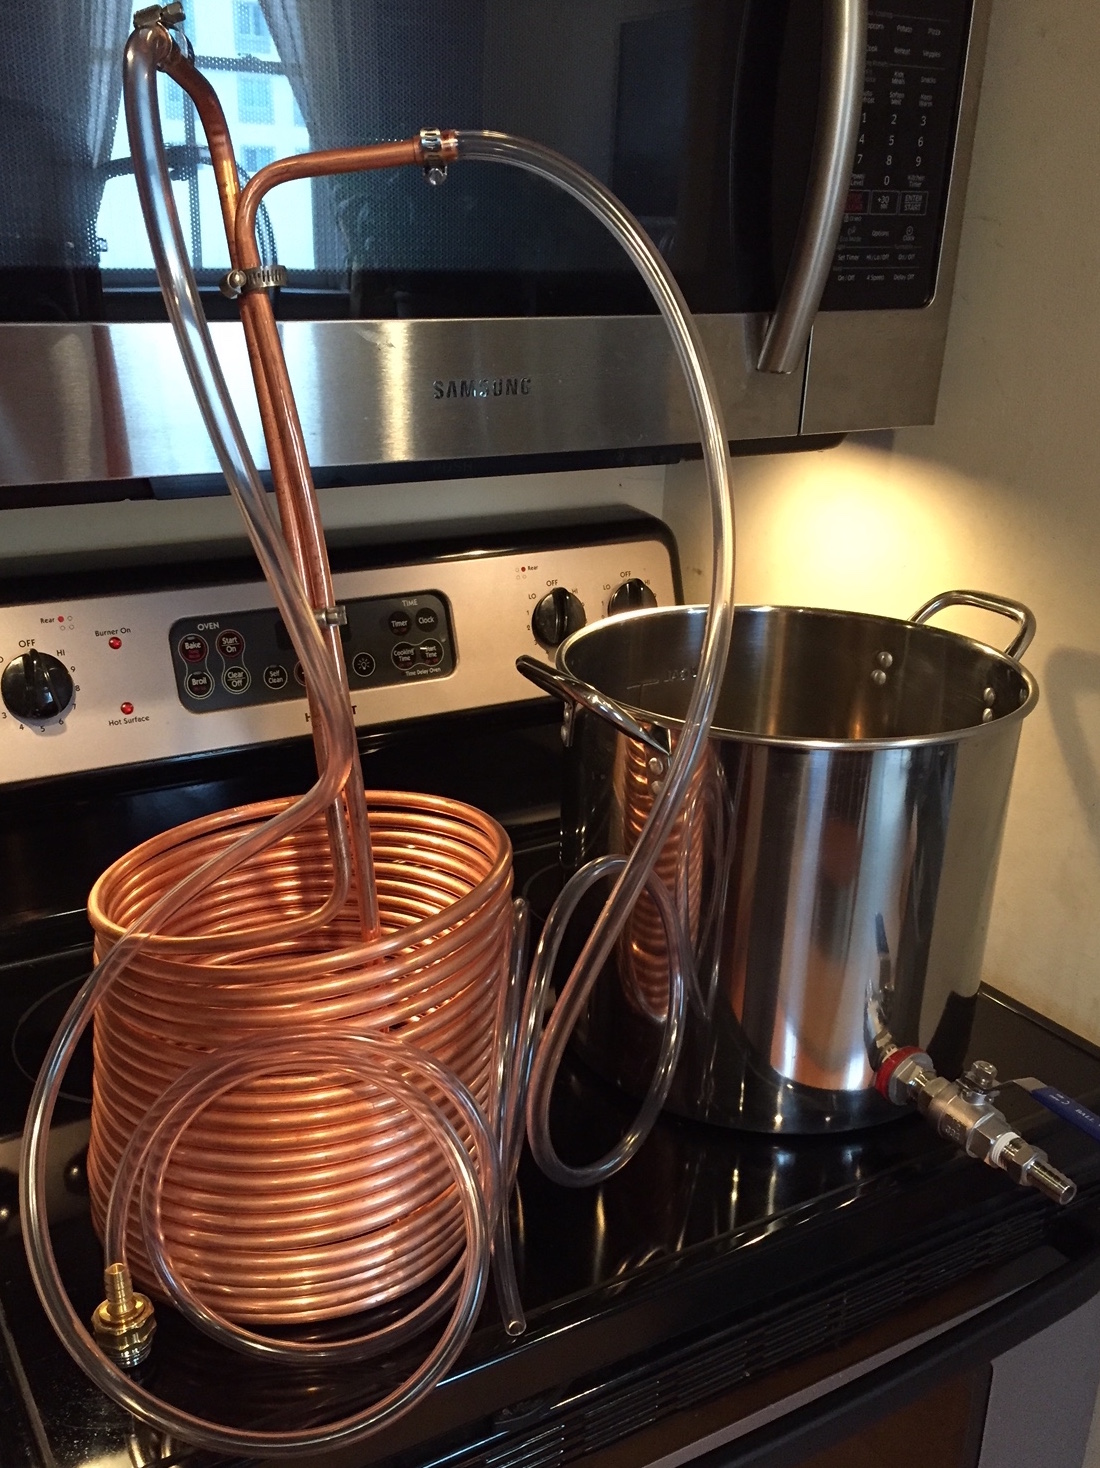
Two new toys: an immersion cooler (left), and weldless ball valve and spigot (right).
These two pieces of equipment should serve to improve my brewing process for a couple of different reasons…
One problem/challenge which faces all brewers, but is particularly an issue for the non-industrial homebrewer, is improving the clarity of the end product. Its common for homebrewed beer to have some degree of cloudiness due to suspended yeast particles, proteins, and tannins. Filtering apparatus can be both expensive and space-consuming (quite the challenge for apartment-dwelling grad students). One of the easiest ways to address cloudy beer is to add Irish Moss to the boil for the last 15 minutes. Irish Moss has a charged surface that attracts tannins and proteins in the boiling wort; at the conclusion of the boil the Irish Moss settles to the bottom of the kettle with the rest of the trub (hence removing the troublesome compounds). This process is not unlike the action of alum in drinking water clarifiers (Civil/Environmental Engineering FTW!). Another solution is to cool/chill your wort as quickly as possible. Increasing the speed that one’s wort is chilled can force tannins and proteins to accumulate and settle to the bottom of your brew kettle, before the mash even makes it into your fermenter. This is the primary goal of immersion coolers like the one showed above.
But I digress…
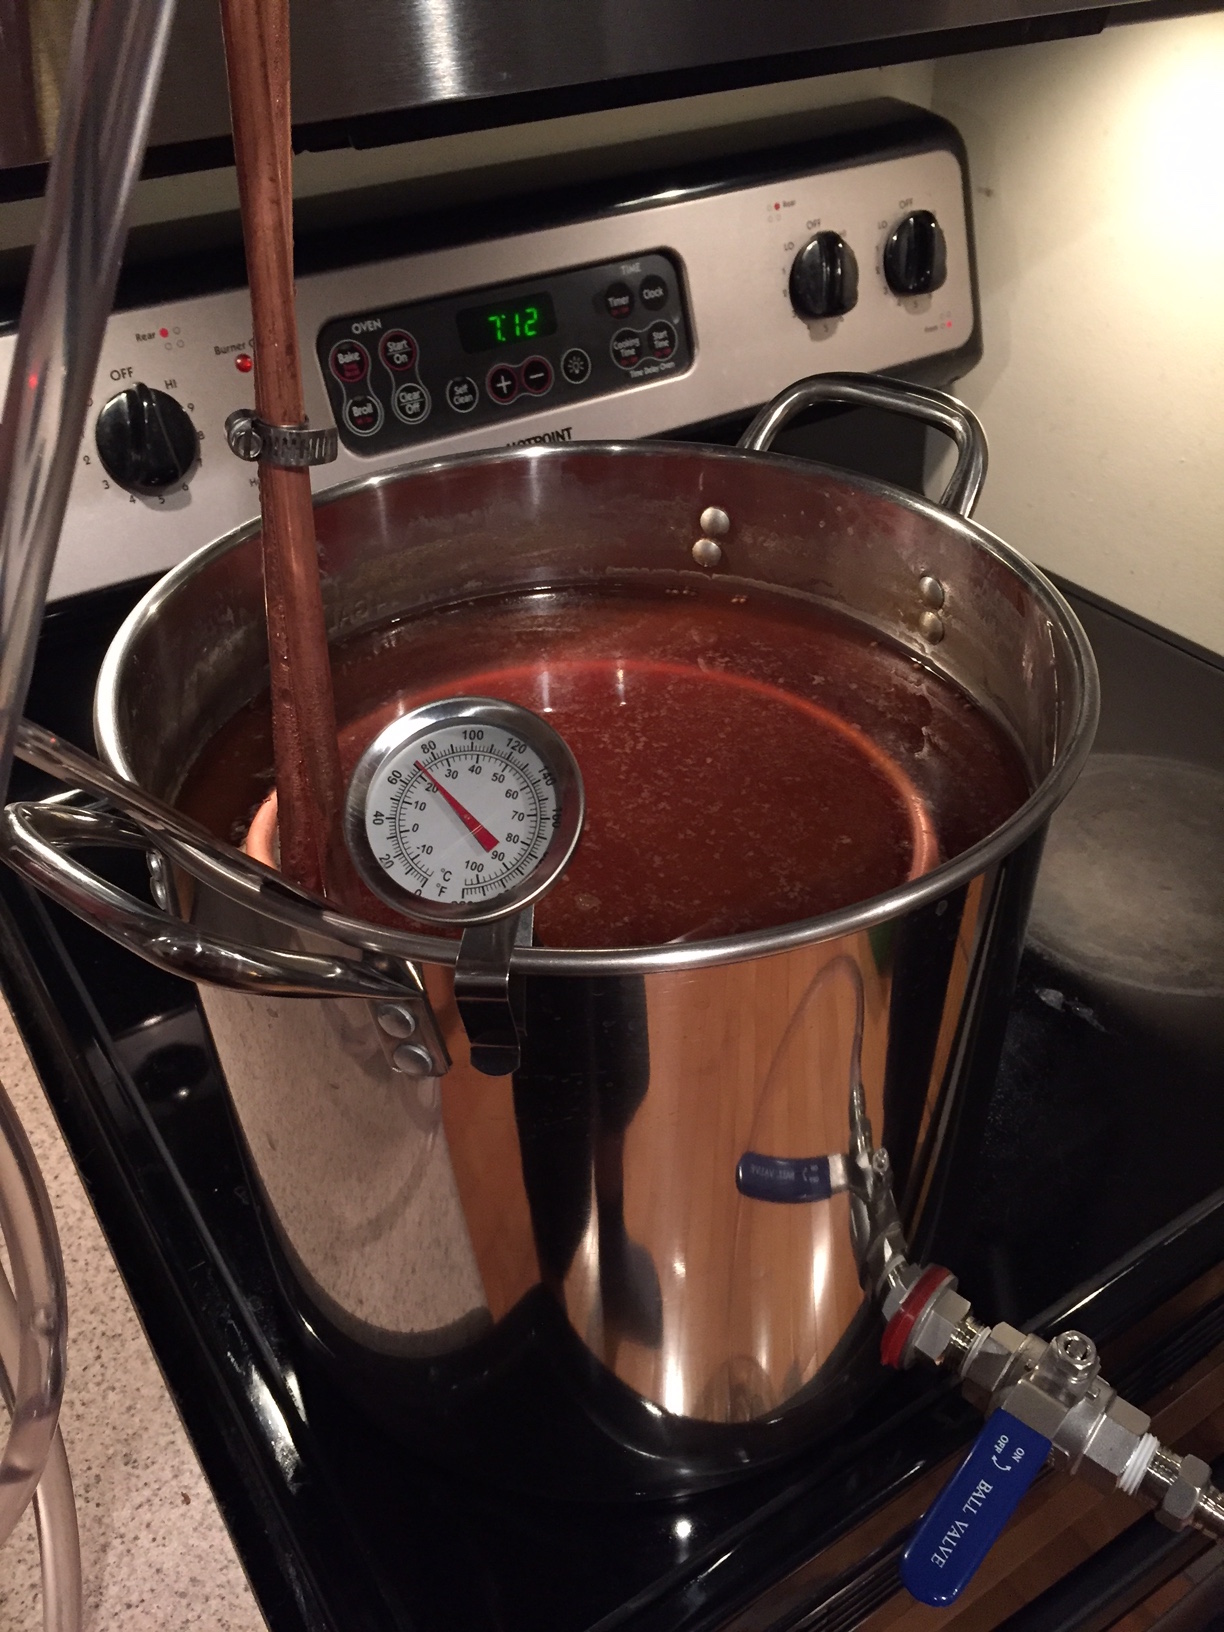
The mash went well which is not unexpected with the small mass of grains I was working with…
Itsy bitsy teenie weenie yellow polka dot … mash (?)
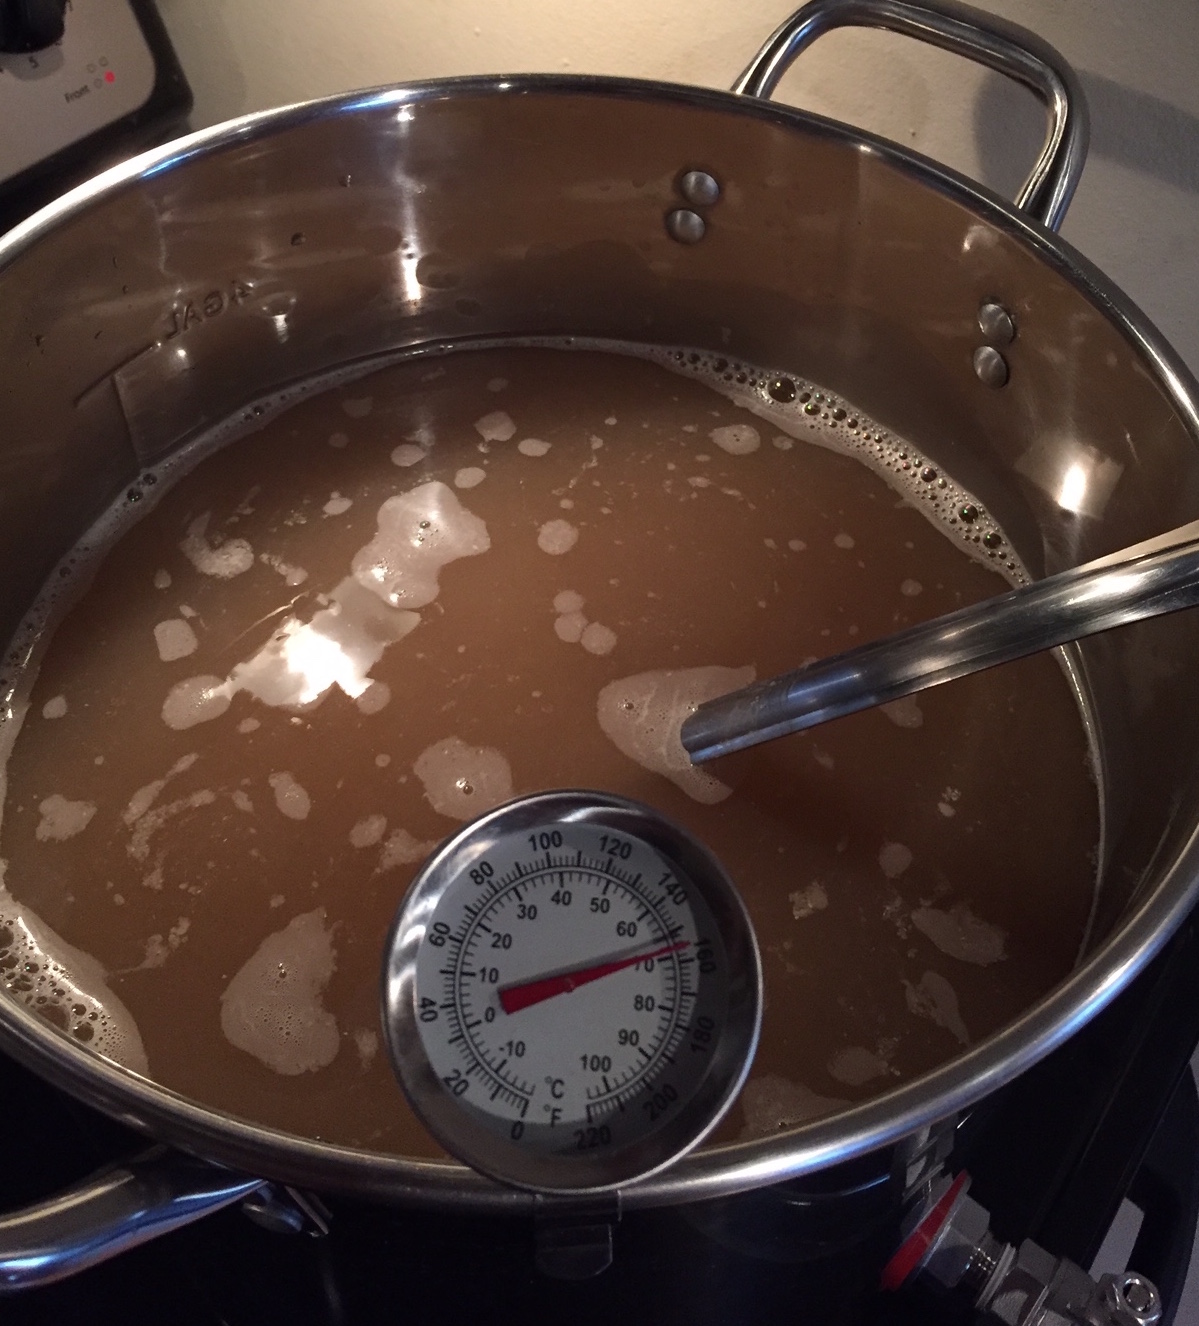
I sparged the grains with 1.0 gallons of water pre-heated to 155 F. Note: Usually, you want your sparge water to be a little hotter than the wort, but on the electric stove I use 168-170 is impossible (without modulating the burner and constantly stirring: its either 155 or jumps right to 180) and I don’t want to burn the grains. Because I brew with partial mash recipies, after the grains are sparged, I add either/both liquid malt extract (LME) or dry malt extract (DME) to fill out the original gravity, fermentable profile, and water chemistry of the wort. Depending upon the recipe/style hops can also be added at this step or later on. The wort is then brought to a boil, and then held at boiling for usually an hour, as the flavor profile develops and alpha acids are driven off the hops.
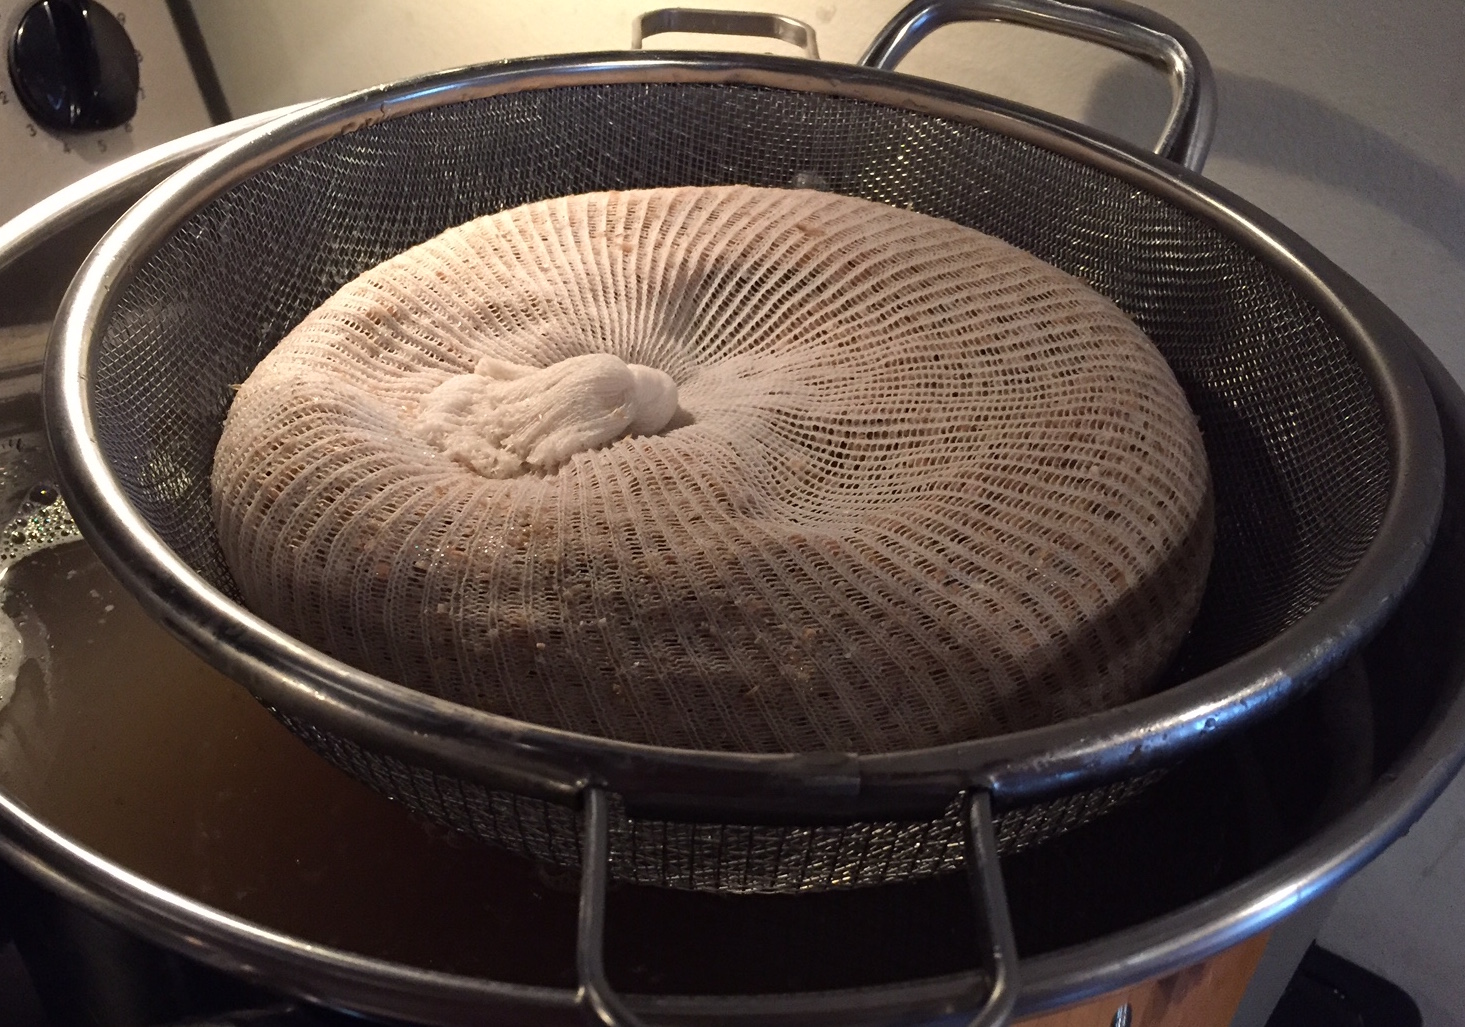
Sparging the grains…
Using the immersion chiller went really smoothly after the boil was complete. The chiller goes in the kettle at t-15 minutes (relative to end of boil) so it can be sanitized by the boiling water, you can add irish moss at the same time. At the end of the boil you just need to remove the kettle from the heatsource, cover with a lid (to prevent air/dust-borne bacteria from fallling in, and start the water flow through the chiller).
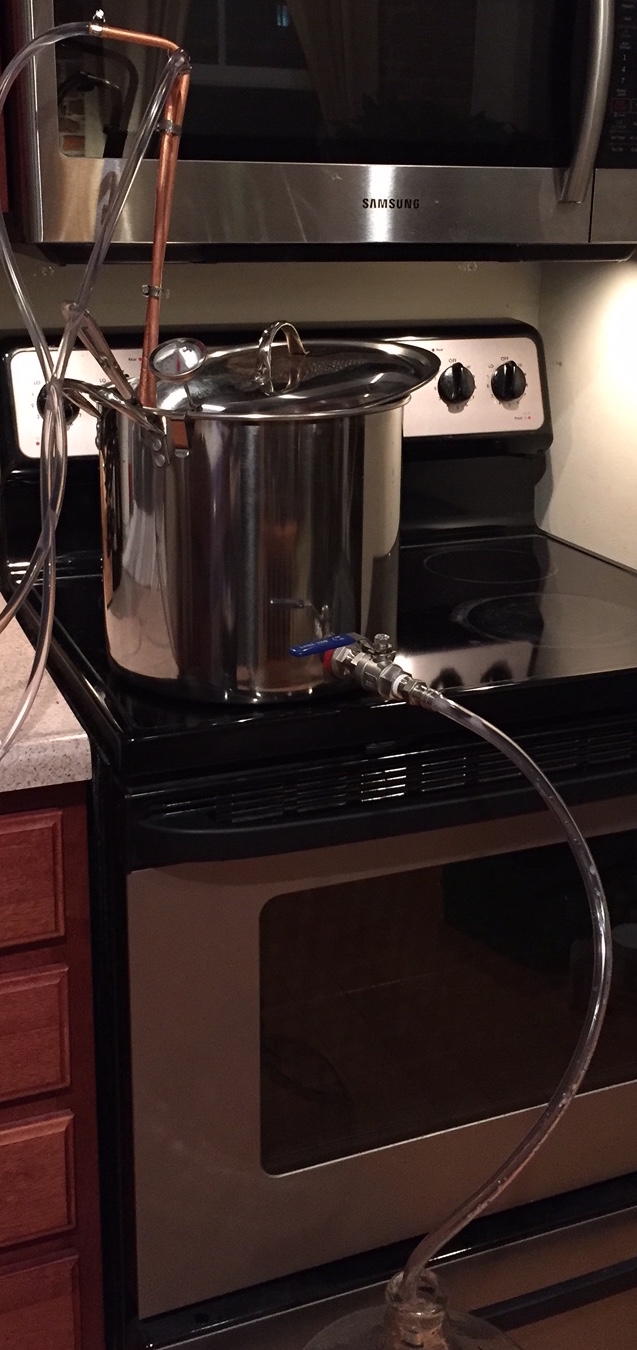
Chilling out (last pun I swear).
Wort up! I’m sorry I can’t help myself.
The immersion chiller was able to bring the boiling wort from ~212 F to 70 F in roughly 15-20 minutes (next time I’ll actually keep track). This is much faster than my usual method of an ice bath, which typically takes around 1.25-2 hrs depending upon the ambient temperature in the room and how much ice and water I’m willing to use.
Similarly, the tap I added to the kettle was a nice upgrade to my usual methods. I was able to easily transfer the cooled wort to a carboy (you can see the setup in the figures above) using high temperature tubing and nothing but gravity. The chiller acted a little like a “screen” preventing the larger chunks of trub from making it to the tap, and not having to move or pick up the kettle to pour the wort into a funnel eliminated transport of much of the fine trub sediment.
All in all, I cut about 1-2 hours from my total brew day with just these two upgrades. For your money, you might be hard pressed to find another way to make your brewing more user friendly.
Edit/Followup:
The Gose turned out really well. :-)